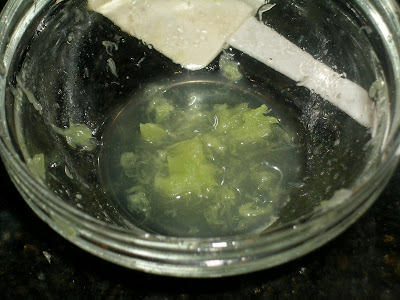
Lessons Learned: de-pulping key limes is HARD! I have bought key-lime juice in the past, but man oh man, if I could out-right purchase key lime pulp.... I would totally do it. When I make these again (and I will... these are definitely a high-ranker in terms of flavor in our house, and I see them being made well into and through the summer!) I will try different methods of de-pulping. maybe I'll even try the food processor. you know.. once I figure out if eating key lime rinds is ok.
Saturday, May 2, 2009
Right in the Kisser!
Lessons Learned: de-pulping key limes is HARD! I have bought key-lime juice in the past, but man oh man, if I could out-right purchase key lime pulp.... I would totally do it. When I make these again (and I will... these are definitely a high-ranker in terms of flavor in our house, and I see them being made well into and through the summer!) I will try different methods of de-pulping. maybe I'll even try the food processor. you know.. once I figure out if eating key lime rinds is ok.
Thursday, April 30, 2009
Holy Orders
It was agreed that I would make 5 dozen cookies for the New Jersey affair, but I ultimately baked 75 cookies... allowing myself a decent margin should I have any mishaps. I figured any extra I made can be donated to the church for the bake sale... with that many first-time communicants on the loose, I figured the cross-cookie might be an easy sell.
Having learned from my own mistakes, I decided I would stick with a simple (and REPEATABLE) design. I was thinking all-white... with some texturization. given the sheer QUANTITY of cookies I was taking on, I knew my hands would be able to handle only so much piping. the idea of switching back and forth between colors would have probably broken me.
The crosses came out pretty simple looking, but those looks can be deceiving. I completed the cookies in about 5 stages. First I piped the 'outline' of each cross. Second came the flooding. that provided a plain white 'background' for each cookie. I let those sit over night so I'd be working on a nice firm surface the next day. (this would also be the best practice if I were thinking about using colors on top of the white. if the white is not completely dry, you will run a VERY high probability of the colors bleeding. I should know.)
Phase three had me doing the jacquard/scroll pattern on each cookie. I finally hit my 'groove' of this step around dozen number three or four. A VERY important reminder if you do something like this yourself is to go back over these cookies within a reasonable amount of time and 'trim' up the excess scrolling. This is particularly important for stage FOUR... where I once again piped the 'outline' of each cross.
SIDE NOTES:
without the 'trimming', the outlines ended up being either raised up or crooked, period. I also feared that with the raised up edges, they would be the first area of breakage when the cookies would be shipped. the textured cookies are adorable in all the various ways they can be done.. but cracko! first to go every time.
Also? Some may argue that the final 'outline' is not necessary, but personally i feel it lends a polished and profession touch to each cookie. Blame the engineer in me, but I like seeing definitive edges.
The final step for the cookies was to (after one more night of hardening/drying time) was to brush a luster dust over each cookie to give a pearlized sheen. (Note to self-- I NEED to get a bigger design brush.. using the little one took me FOREVER!)
During my 'down time' of waiting for the royal icing to dry.. I worked on the favor tags. I found some great pearlized green card stock that I used as the springboard for my design. (also why I chose to do the luster-dust on each cookie)
I printed the pertinent info on some heavy white card stock, then used one of those fancy-shmancy scissors to cut out and glue on to the green paper. Also? found a bucket of table confetti and glued a flower to each 'tag'. The flower confetti was also pearlized... so it was a perfect match.
Before I knew it, it was assembly time. Bag, tag, tie, pack. repeat 60 times.
I will also take a moment to note that the ribbon i used was squeezabley adorable. perfect color match, and just the right width. and who can resist a polka dot? AWESOME, I say!!
Finally, all 59 cookies were bagged and tagged. (yeah... one broke cause I'm clumsy and dropped it. I was bummed at first, but then I ate it. No sense mailing a broken cookie, and I was running low on energy, anyway. )
The most unsettling thing in this whole process for me is what came next... boxing up. Usually I shrink-wrap each cookie, but I opted for favor bags this time. I have no idea if they will 'behave' differently en route...but I definitely used about $20 worth of bubble wrap.
So that's it! the cookies have been mailed, and should arrive either tomorrow or Saturday. I toyed with the idea of driving them up myself, but my husband vetoed it on grounds of not being safe with the amount of time between MY class' mass and the one in New Jersey. I definitely put enough love in each cookie, so I'm sure the guest of honor will know how much we're missing her on her special day.
Love you, Laney-Bird! I hope you enjoy your cookies!
Wednesday, April 22, 2009
Citrus Inspiration
Tuesday, April 21, 2009
Heart-Shaped Genius
I'm really not one to boast... (ok, maybe a little!) but when I get these 'great ideas', I certainly like to share them. Then I blog about them! (ok.. so maybe I am a bit more than a little boastful!) but it's certainly validating to tell someone (or post about) my great idea or creation and get some positive feedback. Besides.. it's not like my kids are all that interested in what I'm doing. At least not process-wise. to them, it's all "show me the cupcakes!"
At any rate.. I HAVE to share my latest "ah-hah!" moment. Granted.. it's not a pretty sight. in fact... I SHOULD make the disclaimer that I swear I am not making any illegal drugs in these pictures.... despite the appearance otherwise.
Yesterday, I made sprinkles. Lemon-flavored, heart (and circle!) shaped SPRINKLES.
Originally, I was going to take some gumpaste, dye it yellow, add in some lemon extract, roll it out, and attempt to cut out some cute shapes so I could apply them to my newest Happy Jane flavor. but then it hit me..... STARBURSTS!!!
They were SO awesome to shape into veggies when I made Danny's birthday cake... why not melt them down and do the same thing here? So that's exactly what I did. Melted, coated with corn starch to reduce the stickiness... rolled them flat, then used my piping tips to cut out some circles...
and used a heart-shaped hole punch to get the heart sprinkles. GENIUS!
I was so happy with the results, I just HAD to blog about it. I mean.. the color was vibrant! the FLAVOR was perfect in this case... and the hole-punch was just too too easy. TOTALLY worth my $5 hunch I had when I bought the puncher. I can't wait to go and buy more shapes now. The cupcakes, janes, and cakes (as well as pancakes!! and ice cream!!) I imagine waiting to be sprinkled now are endless.
I'm sure I will eventually use the gumpaste with color and flavor to match my occasion.. but if starburst makes a color and flavor... you can bet I'll use them in a heart beat. (get it? HEART beat??)
I love it when a plan comes together!
Sunday, April 19, 2009
Because "Intense Chocolate" Makes Me Happy
I served it up with some nice cold whipped cream, and that was a good pairing, since the title is no lie.. it is a VERY intensely chocolate cake.
just.. don't judge me when I tell you that NEXT time I make this??? I'm totally gonna add chocolate CHUNKS to the mousse filling. huminuh huminuh.. now THAT'LL be intense!
Sunday, April 12, 2009
Easter Bunnies are Crumblin' to Town
So from my family to yours... the four of us wish you a "Hoppy" Easter.
Saturday, April 11, 2009
Going, Going, Gone
Nonetheless, I think the guest of honor enjoyed her special cookies, and it was a pleasure to see her one more time before she left. She will be missed here in the neighborhood, and San Francisco is lucky to be getting her.